The First Week of Preschool: What to Teach Before You Teach the Curriculum

I remember planning a craft for a group of 12 children who were around two-and-a-half to three years old.

I don’t remember exactly what we were making, but I remember that I had a very specific result in mind. I wanted the children to cut their own pieces and glue them onto the page.

In my head, it seemed simple enough.

Except some of these children had never even seen a glue stick or held a pair of scissors before.

Instead of recognizing that they were still learning how to use the materials, I became frustrated.

“No, that’s not how you use the glue.”

“No, we don’t hold scissors like that.”

I was trying to help 12 very young children cut, glue, follow directions, and create the result I had already imagined. I became so overwhelmed that I finally gave up and threw the whole activity away.

But the frustration did not disappear when the craft did.

I carried it with me for the rest of the day.

The children had not done anything wrong. I had expected them to use two unfamiliar tools, follow several directions, and make a specific product—all at the same time.

I was focused on the activity I had planned instead of the children standing in front of me.

I think we can easily do the same thing during the first week of preschool.

We are excited. The classroom is ready. The curriculum is planned. We want to begin.

But the children may not be ready for everything we have planned yet.

Before we teach the curriculum, there are other things they need to learn first.

They Need to Learn That We Are Safe

When children enter our classroom, they do not know us yet.

They do not know if we will help them when they are upset. They do not know if we will listen when they say no. They do not know how we will respond when they make a mistake.

A child who does not follow a direction during the first week may not be defiant. They may be unsure, overwhelmed, or afraid.

Relationships have to come before compliance.

We can greet children by name, get down to their level, sit beside them while they play, and notice what they are interested in. We do not have to immediately question them or direct their play.

Sometimes they just need us to be there.

We can say:

  • “I’m glad you’re here.”
  • “You can stay close to me while you look around.”
  • “You can watch until you’re ready.”
  • “I’ll help you.”

These moments may not be written into the curriculum, but they are what allow the curriculum to happen later.

They Need to Learn What Will Happen

Adults understand how a classroom day works.

We know that cleaning up does not mean the toys are gone forever. We know that snack comes after outside time. We know that every grown-up will return at the end of the day.

The children may not know any of that.

Even children who have been in preschool before have not been in this classroom. They still need to learn how our room works.

We do not need to explain the entire schedule at once. We can explain each part of the day as it happens.

“First we put the blocks away. Then we choose a book.”

“When you hear this song, it is time to clean up.”

“Your mommy or daddy will come back after our classroom day.”

We may have to repeat ourselves many times.

That does not mean the children are not listening. It means they are learning.

They Need to Learn How to Use the Classroom

When I think back to that craft, I realize I was trying to teach too many things at once.

I wanted the children to learn how to hold scissors, how to cut, how to use glue, where to place the pieces, and how to complete the project I had planned.

Now I separate those skills.

If children are learning how to use glue, I might put a large piece of butcher paper on the table, provide glue sticks and precut squares, and let them glue the pieces wherever they want.

The goal is not to create a particular craft.

The goal is to explore the glue.

They can learn how much pressure to use, how to twist the glue up and down, and how to make something stick. Once they understand that material, we can build on the skill later.

Preschool teacher helping children learn how to use glue sticks during open-ended art

The same idea applies throughout the classroom.

The way the room is arranged can make this easier for children, too. You can see how I set up my preschool classroom here.

We can show children that playdough stays on the table without showing them exactly what they must create. In dramatic play, one child may use the kitchen to prepare dinner, while another turns it into a restaurant, bakery, or grocery store.

We provide the boundaries. The children decide where the play goes.

This shift is also what led me to think more deeply about why open-ended play matters.

They Need to Learn That Big Feelings Are Allowed

The first week can be overwhelming.

There are new adults, new children, unfamiliar noises, different routines, and separation from the people children trust most.

Big feelings are not interruptions to the first week.

They are part of the first week.

A crying child does not need to be hurried into feeling happy. A child who is not ready to join the group does not need to be forced into participating.

We can say:

  • “I know—you miss your mommy or daddy. I’m right here with you.”
  • “I know—it’s frustrating when a friend is using the toy you want. We can set a timer.”
  • “You don’t have to join yet. You can watch from here.”
  • “Your body looks upset. Let’s take some deep breaths.”
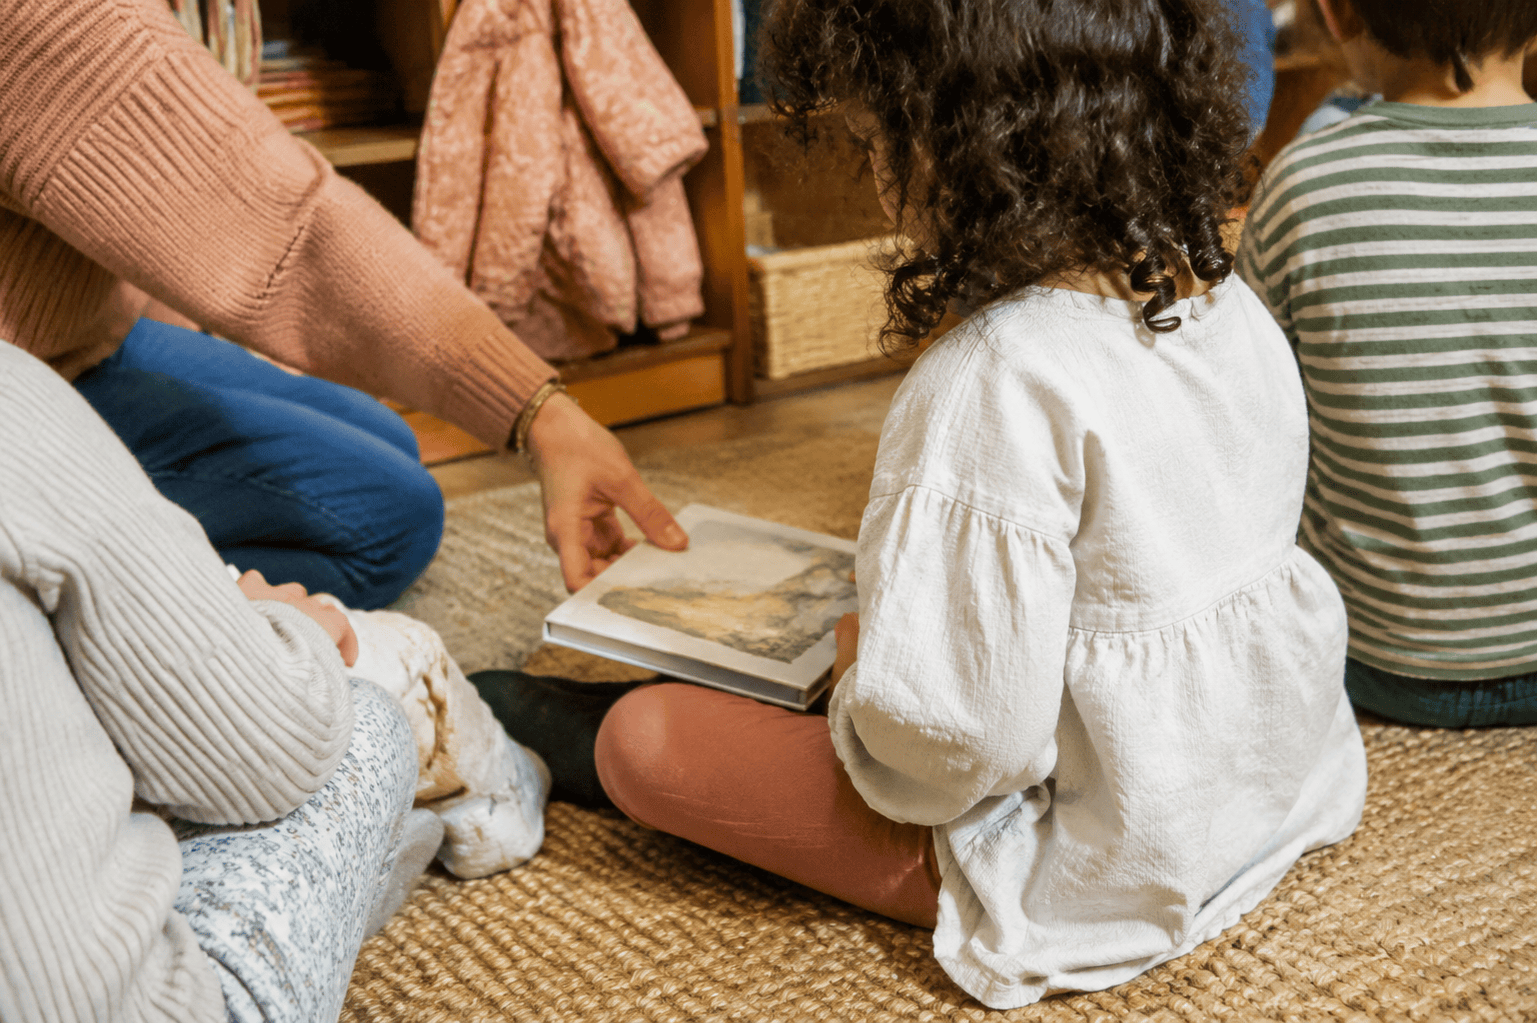
Preschool teacher sitting with children and helping them feel safe in the classroom

Supporting a child’s feelings does not mean allowing unsafe behavior.

We can say, “I won’t let you hit. You are angry, and I’m going to help you keep everyone safe.”

Children need to experience us staying calm, holding the boundary, and helping them through the hard moment.

They cannot learn that from one conversation at circle time.

I share more practical examples in Simple Strategies for Teaching Preschool Behavior.

The Activities Can Be Simple

I used to think a successful activity was one that ended with the result I had planned.

Now I pay more attention to what the children are actually learning.

During the first week, simple activities give children room to explore and give us room to observe.

We can offer blocks, open-ended art, sensory materials, dramatic play, familiar songs, movement, and uncomplicated stories.

Then we can watch.

Who begins playing right away?

Who needs time to observe?

Who asks for help?

Who becomes overwhelmed during transitions?

Which materials hold their attention?

How do they respond when another child joins their play?

These observations tell us what the children need next.

A completed craft cannot always tell us that.

Looking for More Open-Ended Ideas? If you want practical ways to give children more freedom to explore without having to invent every activity yourself, take a look at my Play Beyond Purpose preschool resources.

The Curriculum Can Wait

I am not saying that children are not learning during the first week.

I am saying that the learning may not look like the lesson plan.

They are learning whether we listen to them.

They are learning how to enter a group, care for materials, communicate what they need, and recover from a difficult moment.

They are learning that another child can have a different idea.

They are learning that they can make a mistake and try again.

They are learning whether this classroom is a place where they feel safe enough to be curious.

If we do not complete every activity we planned, we are not behind.

If the children are beginning to recognize the routines, approach us for help, explore the classroom, and trust that their grown-ups will return, meaningful learning has already begun.

Before we teach the curriculum, we have to teach children that the classroom is safe.

That their ideas matter.

That mistakes can be repaired.

That we will help them learn what comes next.

That is not time taken away from the curriculum.

It is what makes the curriculum possible.

Want More Honest, Practical Preschool Ideas?

Join my email list and download my free How to Teach Two-Year-Olds guide. I’ll also send you play-based activities, classroom strategies, and honest encouragement from a fellow preschool teacher.

Why Open-Ended Play Matters: The Story Behind the Play Beyond Purpose Series

If you’ve ever found yourself searching for new preschool activity ideas, wondering how to encourage more open-ended play, or looking for ways to move beyond worksheets and crafts, you’re not alone. Many early childhood educators believe in play-based learning but struggle to find practical ways to implement it in the classroom. That’s exactly why I created the Play Beyond Purpose series—a collection of child-led, open-ended activities that transform everyday objects into meaningful learning experiences.

But before I tell you about the series itself, let me tell you how it all started.

Every year as summer approaches, our preschool begins planning its summer program. For the past several years, I’ve become the unofficial “theme person” at my school.

“Lindsay, can you help us come up with summer themes?” my director asks.

Part of me gets excited every time. The other part thinks, “Here we go again.”

Traditionally, our summer program follows a familiar format: a weekly theme with a planned activity for each day. Every classroom follows the same theme, and same activity… just like the rest of the school year. It becomes a cycle of wash, rinse, repeat. Different theme, same approach.

This year, I wanted something different.

I started thinking about a moment from a few years ago when I was cleaning out the classroom. There was an old roll of Christmas wrapping paper that had been sitting around for who knows how long. Nobody wanted it, and I was ready to get rid of it.

Instead, I handed it to the children.

“You can play with it,” I told them.

The looks on their faces were priceless.

“What do we do with it?” they asked.

“Whatever you want.”

More confused looks.

“Do you want to rip it up?” I suggested.

Their eyes immediately lit up.

Without another word, they started tearing into it. Paper flew through the air. Children tossed it, buried themselves in it, and even pretended to swim through the piles of scraps.

“This is the BEST DAY EVER!” They repeated it over and over again.

And all of that joy came from a simple roll of wrapping paper.

That was my lightbulb moment.

What would happen if we took everyday objects and used them in unexpected ways?

The idea sounds simple, but I couldn’t stop thinking about it. I pitched it to my director, and she loved it. We decided to build our summer program around ordinary objects explored through open-ended play.

When summer began, our first theme was instruments.

I was excited to see how teachers would transform them into something new and unexpected. Instead, many activities looked very similar to the projects we already did throughout the year.

At first, I felt frustrated. Then I stopped myself.

Not everyone thinks the way I do.

I’ve been teaching for a long time, and one of my greatest strengths is creativity and curriculum development. Looking at an everyday object and imagining ten different ways children could explore it feels natural to me.

But what if it doesn’t feel natural to everyone else?

That realization changed everything.

I started wondering how many teachers wanted to create more open-ended experiences but weren’t sure where to begin. How many teachers were tired of crafts with predetermined outcomes but needed practical examples of what to do instead.

And that, my friends, is how Play Beyond Purpose was born.

Play Beyond Purpose is built on a simple belief: children don’t always need instructions. They don’t always need a finished product. They don’t always need an adult telling them the “right” way to use something.

Sometimes they just need an invitation to explore.

When children are given the freedom to experiment, create, problem-solve, collaborate, imagine, and discover, incredible learning happens. The skills they develop through open-ended play often run deeper than anything we could teach through a worksheet or step-by-step craft.

This series was designed to help teachers see everyday materials differently. Each unit takes a familiar object and transforms it into opportunities for exploration, movement, creativity, and child-led discovery.

You’ll find real classroom photos, simple setup instructions, age-range guidance for children 18 months through 5 years old, and activities that are realistic to implement in busy classrooms.

These aren’t worksheets.

They aren’t Pinterest-perfect crafts.

They aren’t activities designed to produce identical results.

They are permission to think differently.

They are encouragement to trust the process.

They are a reminder that play is not separate from learning.

It is learning.

And sometimes the most meaningful learning begins with something as simple as a roll of wrapping paper.

Why Open-Ended Play Matters

When children engage in open-ended play, there is no predetermined outcome, no right answer, and no expectation that every child will create the same thing.

Instead, children are free to experiment, take risks, solve problems, communicate ideas, and follow their own curiosity.

Research consistently shows that play-based learning supports language development, creativity, critical thinking, social-emotional growth, and problem-solving skills. These are the very skills children will rely on throughout their lives.

That’s why every Play Beyond Purpose activity is designed with one goal in mind: giving children the freedom to explore while giving teachers the confidence to step back and watch learning unfold naturally.

Because sometimes the best learning happens when we stop asking, “What are they making?” and start asking, “What are they discovering?”

Browse the series now! —-> Play Beyond Purpose

Teaching Two Year Olds: The Honest Truth No One Tells First-Year Toddler Teachers

I Was Drowning as a First-Year Two-Year-Old Teacher (And No One Warned Me). Let me just say it. Teaching two-year-olds is not for the weak. And no one — no one — prepared me for what that would actually look like.

I had just returned from maternity leave. I was a brand new mom. Exhausted. Emotional. Still finding my footing at home. And then I stepped into a brand new classroom.

Seven two-year-olds.
By myself.
No assistant.
No backup.

Before this, I had been teaching 4–5-year-olds. I knew how to run circle time. I could plan engaging lessons. I thrived on curriculum design and hands-on activities.

But two-year-olds?

Whole different world.

————–> Download the guide here.

My days didn’t look like beautifully planned thematic units.

They looked like:

  • “No biting.”
  • “Hands to yourself.”
  • “Let’s change you.”
  • “You had an accident.”
  • “We don’t push.”
  • “Gentle hands.”
  • “We sit for snack.”

On repeat.

All. Day. Long.

Between diapering, potty training, and the constant behavior redirection that naturally comes with this age, I felt like I was barely surviving. I couldn’t get through a group activity. I couldn’t bond the way I wanted to. I couldn’t implement the curriculum ideas that lit me up inside.

I went home every day defeated.

I questioned myself constantly:

  • Why can’t I get anything done?
  • Why does this feel so chaotic?
  • Am I even cut out for this age group?

I was drowning — and I didn’t know how to swim in a two-year-old classroom yet.

Here’s what I didn’t understand at first:

A two-year-old classroom is not just a “younger version” of a preschool classroom.

It runs differently.

Yes, there is structure.
Yes, there is a schedule.
Yes, there are routines.

But activities?

They are not the centerpiece.

At two years old, they are still learning the foundational tools needed to:

  • Sit for more than 60 seconds
  • Follow a multi-step direction
  • Keep hands to themselves
  • Regulate big emotions
  • Communicate needs effectively

They are learning how to be in a classroom.

And that realization was hard for me.

Because my passion?
Creating and implementing curriculum.

Letting go of “productivity” as my measure of success felt uncomfortable. It felt like I was lowering the bar.

But in reality?

I was redefining it.

In desperation, I did something I never thought I would do.

I turned to AI.

Yes. Really.

I asked it to help me write a handbook — not for parents, not for administrators — but for me. A mindset guide. A reframing tool. Something to help me stop feeling like I was failing.

And let me tell you…

I argued with it the entire time.

I understood the philosophy behind play-based learning and developmental readiness. I knew the theory. But emotionally? I wasn’t fully on board.

The more I reread what it generated, the more something clicked.

It wasn’t telling me to lower my standards.

It was reminding me that:

  • Diapering is relationship building.
  • Conflict resolution is curriculum.
  • Modeling calm is instruction.
  • Helping a child say “no thank you” instead of biting is language development.
  • Sitting for 30 seconds is growth.

AI had some really good points.

And slowly, my brain began to shift.

Recently, I was given an assistant in my classroom.

And I cannot overstate what a difference that has made.

With another adult present:

  • Diapering doesn’t halt the entire room.
  • I can observe instead of constantly reacting.
  • I can implement small pieces of intentional guidance.
  • I can breathe.

Now, I finally have the space to begin putting those mindset shifts into action.

And here’s the biggest lesson I’ve learned:

Two-year-old classrooms are less about delivering curriculum and more about laying the neurological groundwork that makes curriculum possible later.

That is not “doing less.”

That is doing the deepest work there is.

If you are:

  • A brand new toddler teacher
  • A seasoned teacher new to the 2’s
  • A mom balancing postpartum hormones and a classroom full of toddlers (Like myself)
  • Feeling defeated daily
  • Wondering why nothing feels “productive”

I see you.

You are not failing.

You are building:

  • Emotional regulation
  • Social boundaries
  • Language skills
  • Body awareness
  • Trust
  • Safety

That is real work.

Hard work.

Holy work.

I took everything from that AI-assisted reframing process and turned it into a practical, encouraging handbook for toddler teachers who feel like they’re drowning.

It’s not fluff.

It’s not unrealistic Pinterest expectations.

It’s reassurance.
It’s mindset.
It’s strategy.
It’s validation.

And it’s written by someone who has lived it — exhausted, overwhelmed, and wondering if she made the wrong move.

If you need comfort.
If you need perspective.
If you need someone to tell you that diaper changes count.

Grab your copy below

You are doing more than you think.

And the work you’re doing matters more than you know. 💛

Need a potty training quick start guide? Check this out.

How I Use Boom Cards for Assessment in My Preschool Classroom

One of the challenges of teaching preschool is figuring out what children truly understand without turning learning into constant testing.

So much of early childhood education happens through play and observation. As teachers, we watch children build with blocks, listen to their conversations, and notice the small moments when something suddenly clicks.

But every once in a while, I want a quick way to check in on what a child knows without pulling out a clipboard or stopping the flow of the day.

Over the past few years, I’ve found that Boom Cards work really well for this.

A Simple Tool That Feels Like a Game

If you haven’t used Boom Cards before, they are interactive digital task cards that children complete on a tablet or computer.

Instead of worksheets, students interact directly with the screen. They might tap an answer or move something into place.

For young children, the experience feels much more like playing a simple game than completing an activity. That alone makes participation much easier.

In my classroom, most children learn how to use them very quickly. After a little practice, they can usually work through a few cards independently.

How I Use Them During the School Day

I don’t build entire lessons around digital activities, but I do like to include them occasionally throughout the week.

Sometimes the iPad becomes part of a center rotation. One or two children might work through a short activity while the rest of the class is busy building, drawing, or playing.

Other times I’ll sit next to a child and let them complete a few cards while I watch.

These little moments give me a quick sense of what feels easy for them and where they might still be unsure.

Because the format is so relaxed, children rarely feel like they are being tested. Most of them are simply excited to use the iPad.

Why I Like Using Them This Way

What I appreciate most about digital task cards is how easily they fit into the natural rhythm of the classroom.

Instead of setting aside a long time for assessments, I can check in on a concept during normal classroom activities.

It might only take a minute or two, but those small snapshots of learning can be really helpful when planning future lessons.

Sometimes a child surprises me by showing they understand something I hadn’t noticed before. Other times it helps me realize a skill might need a little more practice.

Either way, the information is useful.

Here are some very beginner friendly ways to practice letters, numbers, shapes and colors —> Back to Basics Bundle

If you are just looking for more letter practice, this bundle gives you and abundance of worksheets to choose from —> Letter Of The Week Workbooks

Creating a Few Simple Decks for My Classroom

After using these activities regularly, I eventually started creating a few of my own decks designed specifically for the way I like to use them in the classroom.

My goal was to keep everything very simple so children could focus on the task without needing a lot of explanation.

I tend to prefer clean visuals and straightforward directions, especially for younger learners.

If you’re curious about the types of activities I use with my students, you can browse them here.

A Helpful Addition to the Classroom

Technology will never replace hands-on learning in early childhood classrooms, and I wouldn’t want it to.

But when used intentionally, a small digital tool can make certain parts of teaching a little easier.

For me, Boom Cards have become one of those tools.

They’re quick, engaging for children, and easy to slip into the day when I want a small window into what my students are learning.

And sometimes those small moments tell us a lot.

Check them out here.

Frequently Asked Questions About Boom Cards

Are Boom Cards appropriate for preschool?

Yes, as long as the activities are simple and visually clear. Many preschoolers can use Boom Cards independently after a short introduction. Activities that involve tapping or dragging answers tend to work best for younger learners.

Do you need an iPad to use Boom Cards?

No. Boom Cards can be used on tablets, laptops, desktop computers, or interactive whiteboards. In my classroom I usually use an iPad because it’s easy for young children to navigate.

Can Boom Cards be used for centers?

Yes. Many teachers use them as part of a center rotation. Because the cards guide the activity, students can often work through them independently while the teacher works with small groups.

Are Boom Cards good for assessments?

They can be a helpful way to check in on student understanding. Because the activities feel interactive, many children approach them more comfortably than traditional assessments.

Need letter of the week ideas? Check out these blogs:

Simple Strategies for Teaching Preschool Behavior

Teaching preschoolers to listen to and follow class rules doesn’t have to feel like a constant battle. In fact, with the right approach, it can become one of the most rewarding parts of your day. Young children thrive on routine, clear expectations, and positive guidance. When we introduce rules in a way that feels safe, engaging, and meaningful, children begin to understand that rules aren’t about punishment—they’re about keeping our classroom happy, safe, and fun for everyone. Don’t forget to grab your free posters at the end of the blog!

Check out these children’s books on Amazon! Click the Image for a closer look.

Alphabet Book Series For Kids-Letter C
Alphabet Book Series For Kids-Letter D
Alphabet Book Series For Kids-Letter A
Alphabet Book Series For Kids-Letter B

Why Rules Matter in Preschool

Preschoolers are learning how to be part of a group for the first time. They’re building skills like sharing, taking turns, and listening to others. Classroom rules help set the stage for all of these social skills to grow. When children know what’s expected, they feel more secure and confident. Rules give them the structure they need to explore, learn, and connect with others.

Keep Rules Simple and Clear

The golden rule for preschool: less is more. Aim for three to five simple rules stated in a positive way. For example:

  • “Use kind hands.”
  • “Take care of our toys.”
  • “Listening ears on.”

Short, positive phrases are easier for little ones to remember and repeat.

Involve Children in the Process

Preschoolers are much more likely to follow rules when they’ve had a hand in creating them. During circle time, ask your class, “What can we do to keep our classroom safe and happy?” Write down their ideas, then guide the conversation to form simple, consistent rules. This sense of ownership helps children feel proud of their classroom community.

Teach Rules Through Modeling and Practice

Simply posting rules on the wall isn’t enough—children need to see them in action. Demonstrate what each rule looks like in real life. For example:

  • Show “walking feet” by walking slowly across the room.
  • Pretend to grab a toy and then model “gentle hands” instead.

Give children chances to practice too. Turn it into a fun role-play game where they get to act out the “right” way to follow the rule.

Reinforce with Positivity

Preschoolers love encouragement. Notice when they’re following the rules and say it out loud:

  • “I like how you used your walking feet!”
  • “You listened so carefully during circle time.”

Positive reinforcement reminds children that their efforts are noticed and appreciated. Refrain from phrases such as: “Good Job!” or other generic praises. Try to make them skill specific so the child knows what they did.

i.e: “I love how you used problem solving skills to take turns with that toy.”

Be Consistent (But Kind)

Consistency is key. If you let rules slide sometimes and enforce them other times, children will get confused. Stay steady, calm, and kind. When a rule is broken, gently remind the child of the expectation and give them a chance to try again. Avoid long lectures—short and simple works best.

Use Visuals as Reminders

Visual cues are a lifesaver in preschool. Pair each rule with a picture so children can connect the words with the action. You might show a picture of a child walking to represent “walking feet” or two children holding hands for “kind hands.” Post these visuals at child level where they can easily see and remember.

⭐️ Grab these free posters here. ⭐️ Grab the matching calendar and alphabet set here

Build Rules into Daily Routines

The more often rules are woven into everyday moments, the more natural they’ll feel. Use transitions as opportunities to review:

  • Before lining up, say, “Let’s remember our walking feet.”
  • Before playtime, remind, “Gentle hands keep our toys safe.”

Repeating rules in context helps children connect the words with the behavior.

Celebrate Success Together

When the whole class follows the rules well, celebrate as a group! It can be as simple as a cheer, a special story, or a short dance break. Celebrating reinforces the idea that working together makes the classroom a joyful place.

To Summarize

Teaching preschoolers to listen to and follow rules takes patience, practice, and consistency. But remember—you’re not just teaching rules. You’re teaching life skills: respect, cooperation, and self-control. By keeping expectations clear, modeling positive behavior, and celebrating successes, you’ll create a classroom environment where children feel safe, capable, and ready to learn.

Rules don’t have to feel like restrictions. In preschool, they’re really stepping stones—guiding little learners toward becoming kind, confident, and respectful members of a community.

How I Set Up My Preschool Classroom For The New School Year

The Classroom of Dreams: How I Transformed a Blank Canvas into a Preschool Wonderland.

You may also like:

Why open ended play matters

Ultimate guide to teaching letter of the week

Self grading Assessment/screening tool

New School Year, New Classroom

Step into a world of wonder and creativity as I unveil the remarkable transformation of a once barren classroom into a vibrant preschool wonderland. Through a blend of imagination and practical design, witness how simple elements can come together to create an engaging and enriching space for young learners. From choosing the perfect color scheme to fostering curiosity through decor, join me on a journey through the magic of creating a classroom that ignites the minds of our little ones.

Get ready to be inspired and discover the key to unlocking the potential of any learning environment.

Furniture & Decor

Furniture should be child appropriate, inviting, and comforting. Here is what I have in my room that fits my neutral color scheme.

Choosing the Perfect Color Scheme

When it comes to choosing the perfect color scheme for your classroom, it’s important to consider the impact that different colors can have on the atmosphere and mood of the space. Soft, calming hues like muted pinks and greens can create a soothing environment, perfect for promoting relaxation and focus during the day. Bright, bold colors such as reds and yellows, on the other hand, can be overstimulating for the mind and can make it difficult for the child to maintain focus. By carefully selecting a calming color palette and theme of your classroom, you can create a cohesive and inviting space that engages children on multiple levels.

For my classroom, I have chosen mauve/blush pink and sage green as the main colors, interweaving neutrals such as beige and white to tie it all together. The overall theme can be considered boho, incorporating floral and rattan/wicker patterns throughout.

You can find my alphabet, numbers, and calendar set here.

Now, let’s delve into the next phase of our classroom transformation as we explore the art of designing inviting and interactive learning areas.

Designing Inviting and Interactive Learning Areas

When it comes to creating a dynamic and engaging learning environment for preschoolers, designing inviting and interactive learning areas is key. I follow the ECERS guidelines to accomplish this. You can view their checklist here.

Each section of your classroom should be thoughtfully curated to encourage exploration, creativity, and hands-on learning experiences. From cozy reading nooks with plush pillows and shelves filled with a variety of books to sensory stations featuring textured materials and interactive games, every corner of your classroom should spark curiosity and inspire young minds to learn through play. By strategically placing learning materials at child-height levels and incorporating flexible seating options like floor cushions or small tables, you can empower children to make choices and take ownership of their learning journey.

Let’s break down these areas one by one.

Cozy Area (Library)-Creating a Comfortable and Safe Environment for Play

Incorporating a variety of textures, colors, and soft furnishings can help create a cozy and inviting atmosphere where children feel comfortable to relax and recharge. Consider using rugs, cushions, and bean bags as a way to add comfort. Soft lighting sources such as lamps and string lights can also add a warm and calming ambiance to the space, making it feel like a home away from home for young students.

I found my pillows at a store called “Wow! That’s cheap!” If you have a “Five Below” store near you, they are also a great place to look.
Here is a similar pattern on Amazon.

Block Area

Per ECERS guidelines, here is what I have on my block area shelf. By providing a variety of items in shapes, textures, and size, the child is able to expand their imagination when building.

Math & Manipulatives

Per ECERS guidelines, here is what I have on my math & manipulative area shelf.

Art Area

Per ECERS guidelines, here is what I have on my art area shelf.

It is important to give the children a variety of materials to explore so they can truly express their creativity. You have to keep in mind, some children may not have access to these materials at home.

Science Area-Incorporating Elements of Nature Indoors

One way to further enhance the learning environment in your preschool classroom is to bring elements of nature indoors. By incorporating natural materials such as wood, rocks, plants, and water features, you can create a calming and sensory-rich space that reflects the beauty and wonder of the outdoors. Consider adding a small indoor garden where children can plant seeds, water plants, and observe the growth process firsthand. Introducing natural light through windows or skylights can also help create a connection to the outside world and provide a warm and welcoming atmosphere for young learners. By blurring the boundaries between indoor and outdoor spaces, you can inspire a sense of wonder and curiosity in your students, setting the stage for even more imaginative and engaging learning experiences. A science area is just the place for incorporating these things.

My current set up is summer themed, I plan to change this seasonally.

Dramatic Play Area

Dramatic play can be more than just a kitchen. I encourage you to think outside the box and rotate it through out the year. You can create a pizza parlor, a bakery, a doctor’s office etc.

Voila!

You should now have a well rounded, age appropriate, warm and welcoming calm space for your and your littles to prosper. Feel free to leave any questions or comments below.

You can find more of my blogs through the slider below, or by typing in what you’re look for in the search bar on the home page.

My resources can be found on TpT and Amazon. Links are at the top of the page.

Keep Reading

The Ultimate Guide to Teaching Letter of the Week

Are you looking for the best resources to teach the letter of the week curriculum? Look no further! This guide has everything you need to make learning fun and engaging for your students.

I’m Not Afraid
Baking With B-ABC Discovery Series
Optimistic Outcast With O-ABC Discovery Series
Snail In The Snow

The Ultimate Guide to Teaching Letter of the Week

Are you ready to take your letter of the week curriculum to the next level? Discover the ultimate guide packed with engaging activities, must-have printable resources, and tips for homeschool success. Whether you’re a teacher or a homeschool parent, this comprehensive guide will help you create a dynamic and effective learning experience for your students. From minimal prep tools to creative ideas for reinforcing letter recognition, get ready to transform your lesson plans and watch your students thrive in their literacy skills. Let’s dive in and make learning fun and engaging!,

When it comes to engaging activities for each letter, the possibilities are endless. Incorporate hands-on activities like sensory bins filled with items starting with the specific letter of the week, or have students go on a letter scavenger hunt around the classroom. Get creative with arts and crafts projects that focus on the letter’s shape and sound, or take learning outdoors with nature walks to find objects related to the letter. Open ended play mats are a great resource and will occupy the child for as long as you will let it! By making learning interactive and fun, you can capture your students’ attention and make the learning experience truly memorable.

Alphabet Matching Sets For Sensory Bins – These can be purchased individually or as a bundle for savings.

One creative idea to reinforce letter recognition is to incorporate sensory activities into your lessons. For instance, you could set up a letter-themed sensory bin filled with items that start with the letter of the week. As children dig through the bin, they can search for objects that match the designated letter, enhancing their visual and tactile learning experience. By engaging multiple senses, you can help solidify letter recognition in a fun and interactive way. These hands-on activities not only make learning enjoyable but also provide a memorable way for students to connect with each letter.

This multisensory approach sets a strong foundation for learning, leading us to explore fun ways to practice letter sounds through engaging and interactive games.

Scavenger Hunt A-Z pages – Add to a sensory bin, hang around the room, or have the child cut and paste to the matching image.

Open Ended Play Mats – Versatile, hands-on, and child led. I have several blog posts going into more detail about this. Check out this blog for more info. Scroll down until you see Kingdom under science.

I Spy bags-Create a sensory bag and place over the image card. Have kids use the checklist to mark off items they find.

Letter of the Week Worksheets – Also available on Amazon as workbooks. Practice tracing, recognition, sounds etc. with this variety packet!

2 Step letter practice pages– A complete alphabet handwriting system built around a simple 2-step tracing method that helps kids form letters confidently and correctly — without frustration.

Tips for Homeschool Success

For homeschool success, it’s important to establish a routine that includes dedicated time for learning, breaks for physical activity, and opportunities for hands-on exploration. Transitioning seamlessly into the resources that will enhance your letter of the week curriculum, consider incorporating must-have printable activities that reinforce letter recognition and phonics skills. These resources will not only save you time in lesson planning but will also provide your students with additional opportunities to practice and master their literacy skills. Let’s explore these valuable tools together to set the stage for minimal prep and maximum learning.

Tools for Minimal Prep and Maximum Learning

Embark on an interactive journey of language learning with our fun-filled starter pack that aims to provide a joyful introduction to letters to your little ones. The pack features an engaging mix of educational materials, starting with an original rhyming story designed to pique their curiosity and hold their interest. This story sets the tone and acts as a springboard for the variety of games, worksheets, and flashcards that follow. Each element in the set has been meticulously crafted with the aim to make learning letters an enjoyable and rewarding process.

The versatility of the materials allows children to learn at their own pace, reinforcing alphabet knowledge through repetition and practice. Our all-in-one pack serves as a comprehensive resource for creating a rich, language-intensive environment perfect for homeschooling or preschool settings. It’s the ultimate solution for injecting fun into learning and getting your little ones genuinely excited about letters!

Lingo Lion Introduction To Language

⭐️What’s included:

  • Lesson overview
  • Lesson plan template
  • Alpha-Bay story book (An Original)
  • Lesson 1.1 – 26 uppercase cards – 26 lowercase cards – 52 animal cards to match beginning sounds (there is 26 for each set, so double cards) Fill in the letter pages to extend the activity or incorporate sensory bins
  • Lesson 1.2 – Letter recognition pages, find the letters in the different fonts
  • Lesson 1.3 – Alphabet Kaboom Game
  • Lesson 1.4 – I Have, Who Has? Game
  • Lesson 1.5 – (26) Fill in the bubble pages
  • 8.5×11 Path of motion posters
  • 7×5 Path of motion flash cards

Although these lessons are numbered, they do not need to be followed in any particular order. I have number each of them for easier access if files/pages get mixed. You will find the lesson number in red on the resource.

You may also like:

Dental Health Awareness Month Activities For Preschool & Kindergarten

I Brush My Teeth
Hungry Handyman With H-An Alphabet Series
Baking With B-An Alphabet Series
What Do You Do When It Rains?

Teeth Brushing Experiment

This is one of mine and my kids FAVORITE themes to teach each year. We have so much fun talking about our teeth and how to keep them healthy. There are 2 main books I use as the basis of this week (Although there are several out there).

Jungle Mouth is the first book I use, and BEST book for this theme. My kids are so focused when reading it. It talks about a boy who is getting ready for bed. His Mom tells him to brush his teeth, and he doesn’t. He ends up growing a jungle in his mouth!

We do a week long experiment using eggs (white shelled). These are a symbol of our teeth. We add one egg to plain clean water, and one egg to soda. We leave them in all week (we are not “brushing our teeth”) and observe them each day. Some years I’ve also done an egg with juice, or milk, but I just stuck with 2 this year. The point of this experiment is that your white shelled egg will have turned brown and developed cracks from not brushing.

Interestingly, this is the first year where the plain water egg cracked! Typically I use this one as the example for “brushing your teeth”. I had to think quick on my feet. I explained to the kids, that even though there was clean water, and we didn’t have sugar, we still need to brush with toothpaste the same way we wash our hands with soap, and not just water.

Brush The “Teeth” Activity

This activity is another one I do each year. This year I roped it into both, Jungle Mouth and I Brush My Teeth. It is a cute, short, rhythmic book for how to brush your teeth.

I find that my kids are more engaged when my activities are “decorated”, so I grabbed a piece of green paper as the base and threw some vines I had on the table. We pretended that our “teeth” had jungle mouth and then we used the rhymes from I Brush My Teeth to clean them!

I used ice cube trays, black paint, soapy water, and tooth brushes.

Other Health Resources

Find the cavity Boom Cards – Digital Learning game


Wash the germs away Boom Cards – Digital Learning Game

Ways to stay healthy Boom Cards – Digital Learning Game

Farm theme curriculum for play based preschool

Gracefully Guided With G-ABC Discovery Series
Fearless Fashion With F-ABC Discovery Series
What Do You See In The Fall
What Do You Do When It Rains

Chicken Life Cycle

  • 4 shapes of pasta
  • Chicken life cycle sorting mats & cards 👉🏻here
  • Baskets
  • Chicken life cycle model

Detailed assembly, directions, and other materials links are in the purchased download. I LOVE the way this turned out. I think I might be obsessed with pasta life cycles 😂 This is the second one i’ve done, butterfly was the first, and will definitely do more! Prepare your dried pasta, and have kids sort their chicken life cycle! We discussed what the steps were first, and what each pasta shape represents.

Musical crops (cards)

  • Musical crops cards 👉🏻here

I LOVE how versatile these cards are!

Use them as flash cards to read and learn crops. Use them as a memory game. Use them for musical cards, etc!

⭐️Print double sided on thick paper

⭐️Lay your cards image side down (they should all be, barn side up)

⭐️Hands up, listening ears on!

⭐️Play a song, and then randomly stop

⭐️When the music stops, the players put their hand on a card

⭐️On the count of 3, flip them over

⭐️If you get the scarecrow you’re out

⭐️Remove a card and continue until there is only one person left 🙂

⭐️Print as many copies as you need players

Making butter

  • Heavy whipping cream
  • Jar
  • Crackers (optional)
  • Cute placemats (also optional) 😌

Be sure you are using cold jars and cold cream, or the butter will turn out melted! Add a small amount of heavy cream to a jar, salt is optional, and then close the lid tight! Have kids shake it for 5-10 minutes. Depending on how hard and consistent they are shaking, it should turn into butter! First it will get thicker, keep shaking. Next, it will get even more thick (whipped cream) keep shaking! It will start to then thin out, you guessed it…keep shaking! Finally it will have liquid, this is buttermilk, for the last time KEEP SHAKING! Shake until the butter has formed a ball. Drain the buttermilk and gently squeeze the butter ball to release any more milk left. You can use the buttermilk to bake/cook with. Now test your butter! If your butter begins to look soupy or melted during the end process, (if it’s not forming a ball at the end stage) then your hands, jar and cream are too warm. Pop it in the fridge for a little bit and try again when it has cooled.

Muddy pigs

  • Cornstarch
  • Water
  • Dirt
  • Pigs
  • Containers

Make your “mud” (oobleck). If you have never made oobleck, you simply mix cornstarch and water until you get a mixture where it is somewhat difficult to pinch, yet melts out of your fingers when you do. There is really no way to mess this up 🙂 At first I added brown food coloring to the mixture to replicate mud, however my kids LOVE to get messy at the science table. We decided to add dirt from outside to make it the real deal. They had a blast!

The missing half

There are 5 different pages in this set, I stapled 3 to a book and gave the kids more as they finished 👍🏻

Chics

  • Chics (I got mine from the dollar store during easter)
  • Grassy/hay-like filler
  • Worms
  • Egg cartons
  • Baskets
  • Etc.

Add materials to the sensory bin and fill your chics up and play!

Muddy Pigs

  • Pigs
  • Dirt
  • Barn pieces
  • Metal ramekins
  • Etc.

Add all of your materials to the sensory bin, and get muddy!

Cows/Dairy farm

  • Gloves
  • Water/milk
  • Cows
  • Buckets
  • Etc.

(The pink tablecloth was supposed to represent the belly of the cow) Fill up some gloves with milk, or white colored water. On one finger of the glove, cut a tiny slit for the milk to squeeze through. Add all other materials to the sensory bin and have kids “milk” the cows!

Chicken coop

  • Chickens (made from paper plates)
  • Eggs (from easter)
  • Barn backdrop (Amazon)
  • Shredded paper filler
  • Egg cartons
  • Etc.

Make your chickens by folding a paper plate in half, and the glue on an eye and some “feathers”. Assemble your chicken coop with a box/crate and have kids collect their eggs!

Dairy Farm

  • Cow Placemats from science section
  • Dress up
  • Props
  • Etc.

Set up your cow milking station and milk the cows! Sell your fresh milk at your booth/farmers market.

Build A Pumpkin Play dough
Build A Spider Play Dough
Mini Potion Kit

What starts with the letter Q? Preschool activity ideas for letter of the week

Interesting Illustrating With I-ABC Discovery Series
Quite Quirky With Q-ABC Discovery Series
I’m Not Afraid
If I Were An Elf

Sensory Bin

Hello, and welcome to letter Q week! This was a challenging one no doubt. There are a few tricky letters in the alphabet and this is definitely one of them. I hope that this post can help you with some preschool activity ideas for your classroom. Let’s get started!

Quail

I thought FOR SURE the kids would be tired of this activity by now, but there are a few who have adapted it into their daily schedule. Gotta love the learners 😎.

Check it out here.

Quail Nest

Continuing on the quail train, I also did an additional quail set-up for the indoor sensory bin.

I used oats as the filler and added little baskets for the nests.

Quaker Oats

This was a last minute switch up and admit-tingly…a bit of a cheat 😂. But the kids loved it and it looked beautiful.

STEM-Science, Technology, Engineering, Math

Quicksand

Have you ever encountered quicksand? I have not, but am curious to see what it’s all about!

Add equal parts cornstarch and water to a dish and bury bugs/toys in the mixture.

Have kids rescue the items from the “quicksand” and wash them in a bucket of water and soap.

For more of a challenge add more cornstarch, for less of a challenge add more water.

Quill

I was amazed at how well the kids were writing with these feathers.

I used Canva.com to find the texture/design of the paper I wanted.

Mix black paint with a little bit of water to thin it out.

Have kids dip a feather in the paint and write on the “scroll”.

Queen– Open ended play mats

Open ended play is a great way for your child to express freedom and creativity without the fear of judgement. They will enhance problem solving skills amongst many other developmental milestones.

In the basket I provided:

  • Pompoms
  • Cubes
  • Rings
  • Assortment of buttons
  • Jewels

This set comes from my A-Z Bundle in my TpT shop.

Quilt

The kids just love these scavenger hunts! I try to make the search slightly different each time. Here, I have layered the polaroids in between pieces of fabric. The kids lifted the fabric , looked at the polaroid and matched it on the page.

You can find these in my TpT shop here.

Dramatic Play

Quiznos

Quails Nest

Rainbow glitter sensory bottle set
Build a scarecrow play dough kit
Dinosaur potion making kit