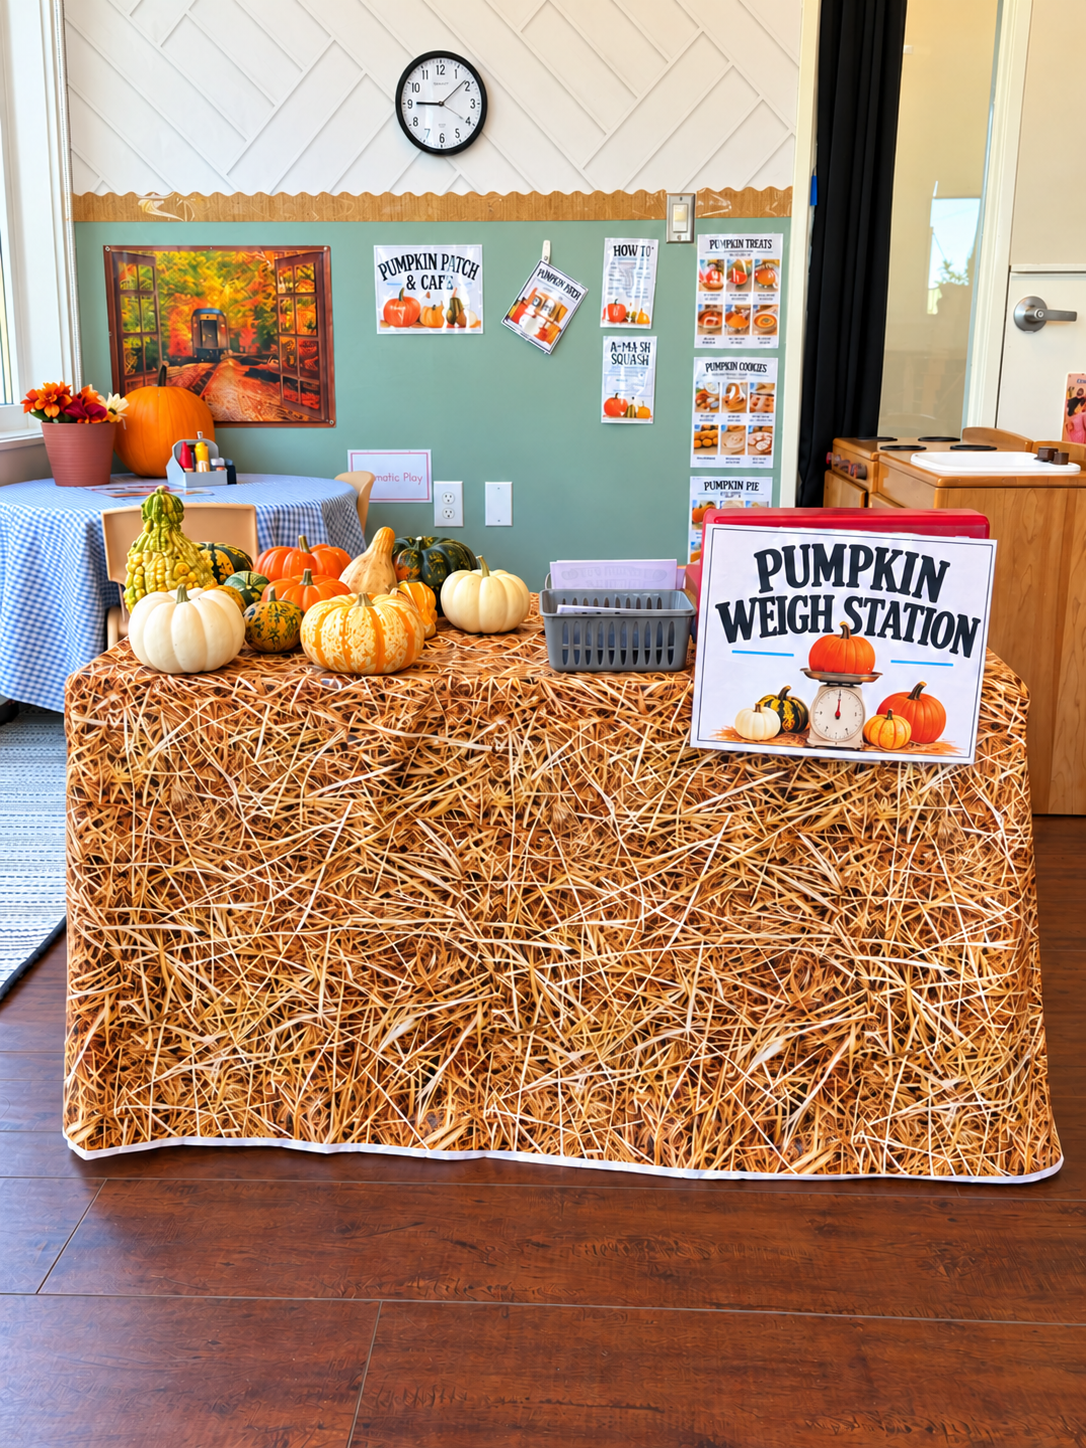
I love changing our dramatic play area—but I do not love feeling like I have to buy an entirely new classroom every time I do it.
For this pumpkin patch dramatic play center, I started with the furniture and props already in our room. Then I added mini pumpkins, a few printable signs, and a handful of things that had been sitting in my cupboards for years. The setup came together quickly, but the play it inspired has been incredible.
If you want to create a similar space without designing everything from scratch, the Pumpkin Patch Dramatic Play Center printables include the signs, menus, labels, process cards, and order forms I used in our classroom.
Start with the dramatic play space you already have
My dramatic play area has a four-piece Community Playthings kitchen, a small table, and a Trofast unit. I did not remove our regular day-to-day materials to make room for the pumpkin patch. I use ECERS in my classroom, so I still need several types of pretend-play props available to the children.
Instead of clearing everything out, I worked the pumpkin patch around what was already there. The kitchen stayed a kitchen. The table became our little pumpkin café. I covered the Trofast with a plastic hay-print tablecloth and turned the top into a weigh station.
That is one of my favorite things about this setup: it looks special to the children without requiring a complete classroom makeover.
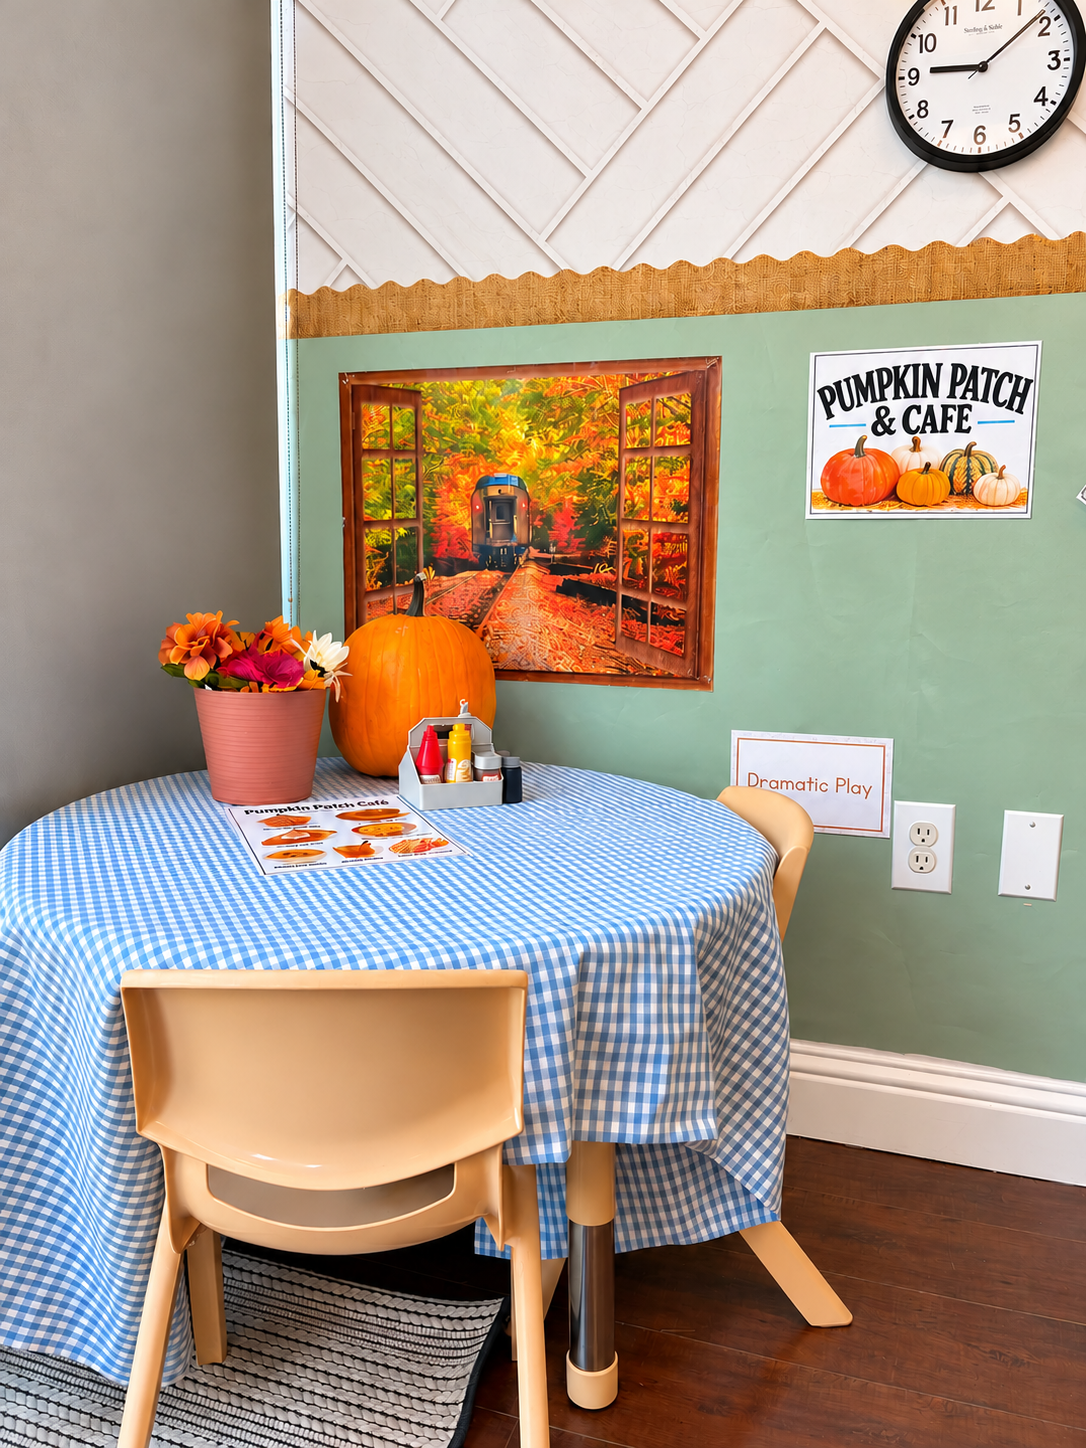
What I used for our pumpkin patch
Most of the materials were things I already owned, saved, or could repurpose:
- Mini pumpkins from Costco
- A plastic hay-print tablecloth
- Small containers from Dollar Tree that had been sitting unused in my cupboard
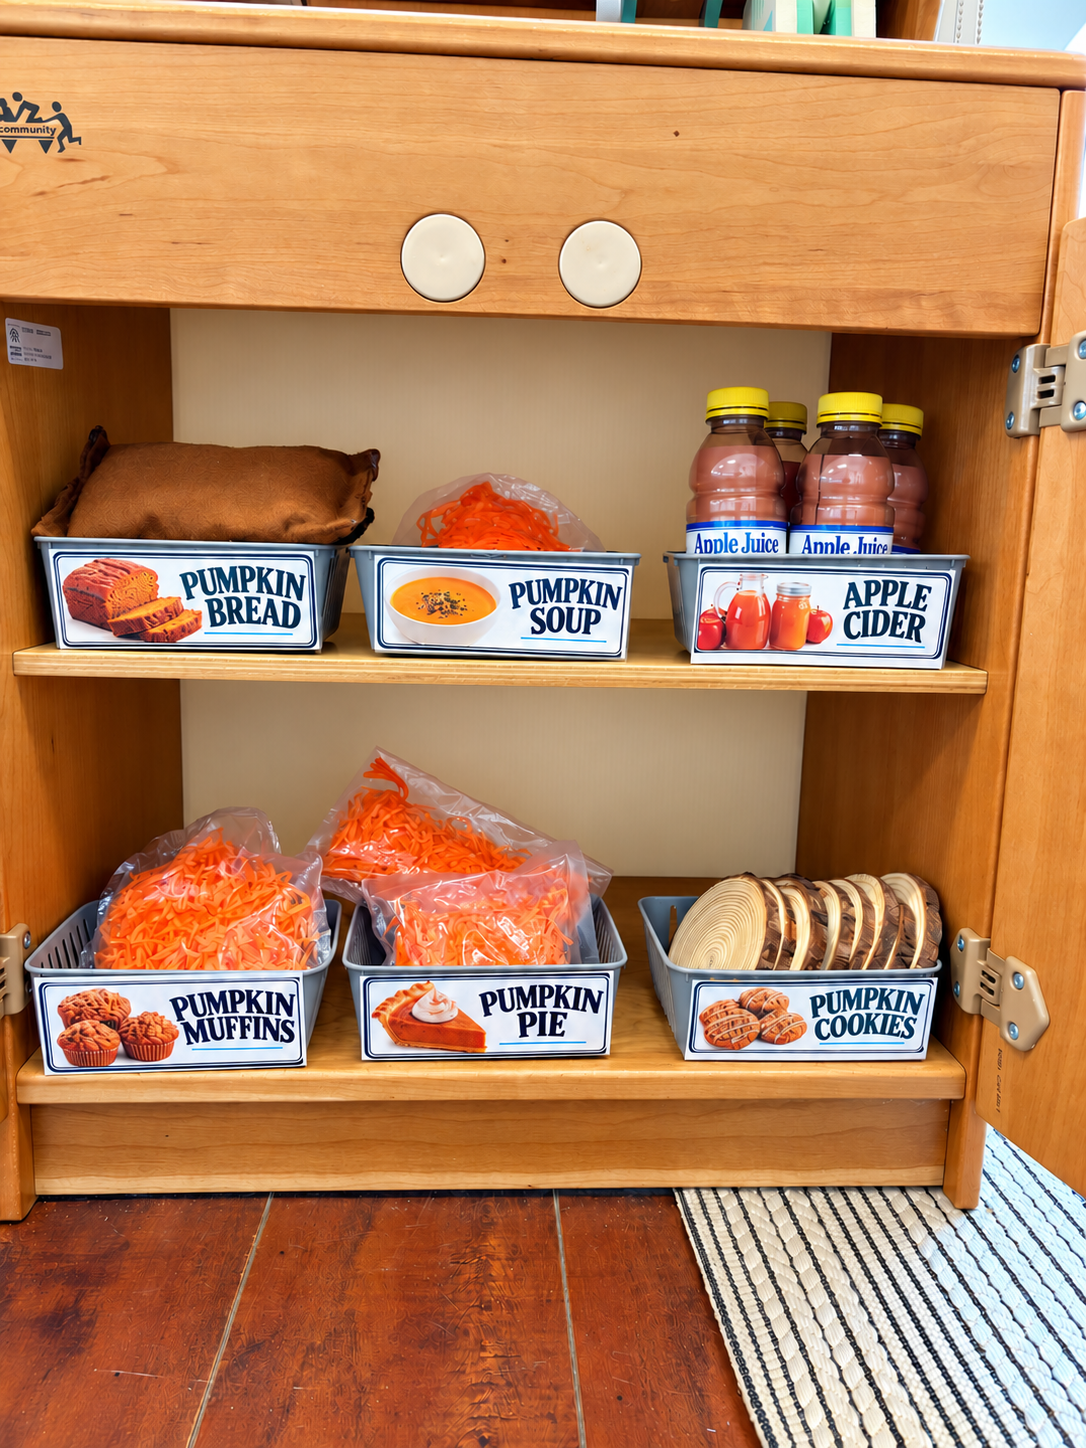
- Wood slices for pretend pumpkin cookies
- Shredded orange paper for pretend pumpkin foods
- Real pumpkin seeds sealed inside FoodSaver bags
- Old juice bottles with new dramatic-play labels
- Whole Foods delivery bags saved from Amazon grocery deliveries
- Our existing cash register, dishes, trays, kitchen tools, instruments, and everyday pretend-play props
I sealed the bags of shredded paper and pumpkin seeds with a hair straightener. They became pumpkin soup, muffins, pie filling, and roasted pumpkin seeds without requiring me to buy miniature pretend versions of every food.
The easiest props were the ones I saved
The old juice bottles may be one of the simplest additions. I washed them, added labels, and placed them back into the play kitchen as apple cider. The familiar containers immediately made sense to the children.
If you have clean bottles, jars, and boxes waiting in a cupboard, my free DIY Kitchen Staples labels can help you turn them into dramatic-play props instead of throwing them away.
The saved grocery bags worked the same way. The children use them to pack pumpkins, fill orders, and make deliveries. Nothing fancy—just something familiar from real life that gave them another reason to keep playing.
Then the children took over
The imagination I have seen in this area makes me want to change our dramatic play setup every month.
One day, the children carried pumpkins to the sink and washed them completely independently. Then they stood in a line along the wall.
“What are you doing?” I asked.
“We are waiting!”
“For what?”
They thought for a second, then pointed to one of the process cards on the wall. They had decided exactly what they were waiting for—even if they did not have the words for it at first.
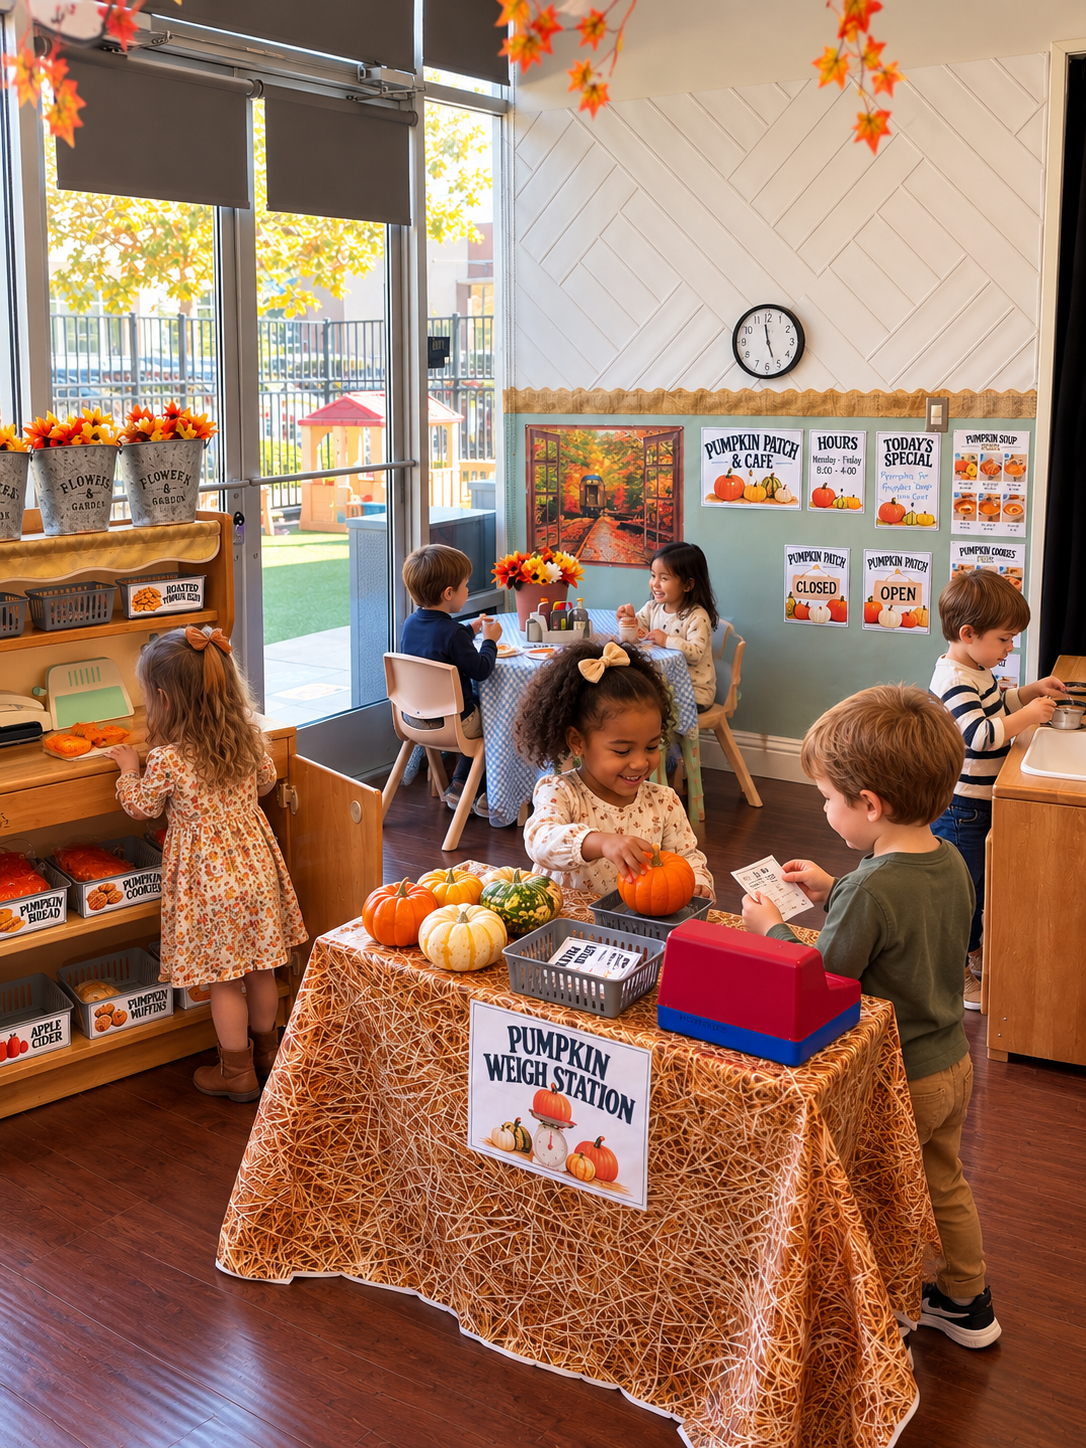
Other children loaded the wood slices onto a tray and “baked” pumpkin cookies. When the cookies were ready, they grabbed a hand bell from our instruments and rang it like a kitchen timer.
They carried the menu and order pad around asking, “What do you want?” and answering, “Coming right up!” They weighed pumpkins, packed them into bags, washed them, cooked with them, and delivered them.
These are late two-year-olds and early three-year-olds. No one assigned those roles. No one showed them exactly how the play should go. The signs and props gave them a place to begin, and then they built the rest together.
A quick setup can create weeks of play
I plan to leave this pumpkin patch in our classroom for the entire month of October. The setup was quick because I used the furniture, storage, and everyday props we already had. The children are the ones who have made it feel new every day.
You do not need to recreate every detail or buy a room full of matching props. Start with what is already in your dramatic play area. Add a few real pumpkins, reuse containers from your cupboard, and give the children just enough information to begin.
Ready to set up your own pumpkin patch?
Use the same signs, menus, labels, process cards, packing lists, and order forms shown in our classroom.
More ideas for your preschool classroom
For another real look inside my room, visit How I Set Up My Preschool Classroom for the New School Year. You can also browse my free preschool resources for practical printables made for real classroom play.

